Kale and Quinoa Patties from the Move
Posted by in Food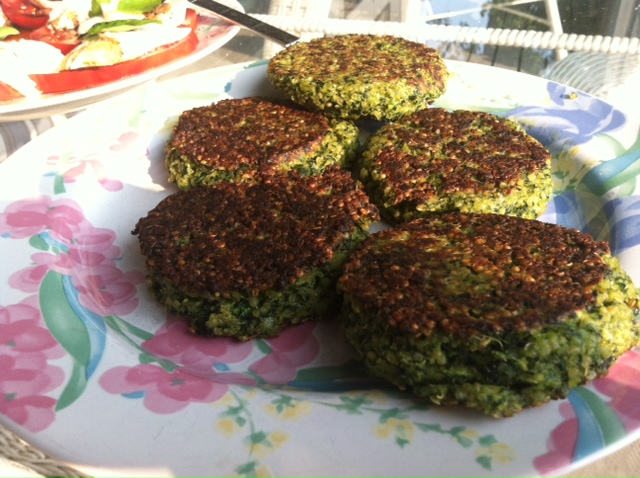 Allow me to be totally honest. Kale and quinoa generally do not excite me. I do not like massaged kale salads. Kale chips are ok but there’s other stuff I’d rather eat. Quinoa is just a weird substitute for rice in my book. Given the choice, I’d rather have rice.
Recently we were embroiled in moving my daughter out of the house into her new apartment – something that took far too long, far too many trips downtown, and too many late nights. I managed to actually make dinner for the family only twice during the whole two week moving nightmare. Other nights were an every man for himself situation when we stumbled home at 9 pm and randomly ate microwave baked potatoes and pizza made in the toaster oven on pita bread. One night we stopped at the grocery store to each grab something we could reheat when we got home. I ended up grabbing kale and quinoa patties from the prepared foods section. And folks, they were really good. They didn’t taste like kale and they didn’t taste like quinoa. They were a little spicy and a little crunchy and deeply satisfying. I loved them. So I decided I had to figure out how to make them myself. On another crazy day I put together this recipe and made them in the afternoon. We reheated them in a skillet for dinner. Totally delicious. If I bring home another batch of kale from the CSA, I’m going to make a big batch and freeze them. Here’s the recipe I came up with:
1 cup quinoa
2 cups vegetable broth
1 medium onion, chopped (I used an uncured onion from the CSA)
olive oil
2 cloves garlic, chopped
4 packed cups kale, ribs removed
salt and pepper to taste
2 tbsp fresh chives
3 eggs
3/4 cup breadcrumbs (I used gluten free)
1/2 cup Parmesan cheese
Bring the vegetable broth to a boil in a pot over high heat. Stir in the quinoa, lower the heat to low and cover, allowing it to simmer about 20 minutes, or until all the liquid is absorbed. Remove from heat and fluff with a fork.
Cook the onion in 2 tbsp olive oil in a skillet over medium high heat until it is translucent. Add garlic and cook for 1-2 minutes.
Boil a pot of water and add the kale, cooking about 5 minutes until it is tender. Drain and put in a food processor.
Add the onion and garlic mixture to the kale and add salt and pepper to taste. Add chives. Process until the mixture is finely chopped.
Dump the mixture into a bowl and stir in cooked quinoa, eggs, breadcrumbs, and Parmesan cheese.
Wipe out the skillet used for the onions and add 2 tbsp olive oil and heat over medium high heat. Using a self-cleaning ice cream scoop (the kind you squeeze and a metal bar swipes the ice cream out), place scoops of the mixture in the pan, several inches apart, gently pressing down on the tops to flatten slightly. Cook until they are browned and crispy on the bottom and flip, flattening slightly with the spatula, cooking until the other side is also browned and crispy and they are cooked through. They need to cook about 2-3 minutes a side. You will need to make several batches, depending on the size of your skillet. The recipe makes about 10-12 patties.
They reheated easily in a hot skillet and we ate them plain, but they would also be good served with tzatziki sauce, plain yogurt, sour cream, or with some sharp cheddar cheese or Swiss melted on top of them, possibly with some sliced mushrooms on top.
Allow me to be totally honest. Kale and quinoa generally do not excite me. I do not like massaged kale salads. Kale chips are ok but there’s other stuff I’d rather eat. Quinoa is just a weird substitute for rice in my book. Given the choice, I’d rather have rice. Recently we were embroiled in … Read more