
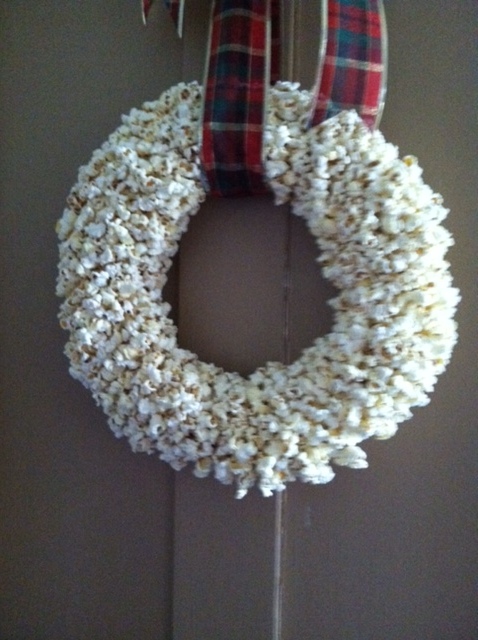
The wreath I saw last year at the holiday tour of homes
Every year my daughter and I go to a different holiday tour of homes. We love to see decorating ideas and also like seeing the insides of other people’s homes (yep, we’re nosy). Last year we went to Niagara-on-the-Lake, a lovely town just over the Canadian border. We saw lots of amazing things and came away with some fresh ideas. One thing that stuck with me was a popcorn wreath. It looked so fresh and white, almost like snow. I kept it in the back of my mind all year and when we started working on updating some decorations this year, I decided to get started on it.
I bought a flat wooden wreath frame at Michael’s. This is the same type of frame I used for my nut wreath, which hangs in my kitchen all fall and is one of the best craft projects I’ve ever made. I put a wire through two of the holes in the frame so that I would have a way to hang it.
I did some Googling for tips on how to make the wreath. Several sites said to string the popcorn then wrap it around the wreath frame. I spent an hour stringing popcorn then found that it looked pretty ridiculous when I wrapped it. First of all, the popcorn on the back of the wreath was going to break off and it was going to scratch against the door. It also ended up looking too orderly. I trashed that and started over. I began gluing popcorn to the wreath with a glue gun. This worked, but it used a lot of glue sticks and I also burned myself over and over because it’s impossible to see where on a kernel the glue is. If it falls off and you pick it up to restick it, you’re going to get burned.
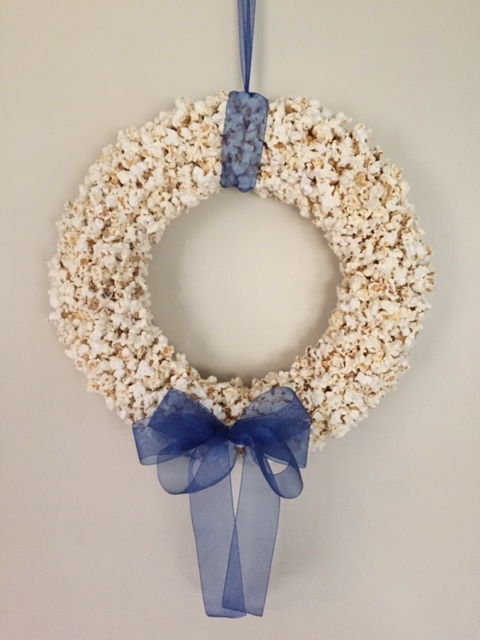
Next I tried using Mod Podge to dip the popcorn in. This saved my fingers from burns, but it also ended up giving the popcorn a very yellowish tinge – it looked like it was buttered or even caramel corn. Next I went out and bought Aleene’s Tacky Glue Clear Gel and that worked better, but still the popcorn turns a little yellow on contact, I think probably from shrinking when it gets moist from the glue. After three bottles of Aleeene’s glue, innumerable batches of popcorn and a lot of therapeutic time spent dipping popcorn in glue then sticking it on the wreath, I declared it to be done. My handy husband did the work with the ribbon to finish it off. I can’t even begin to estimate how much time I spent on this. Maybe 8 hours? I found it rather relaxing once I figured out how to do it well. I’m really proud of how well this turned out. I think mine looks just as nice as the one I saw last year.
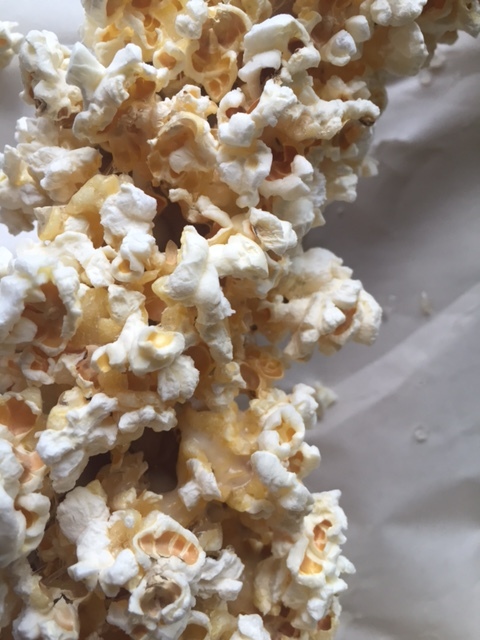
Mod Podge disaster
 Now, please learn from my experience. If you’re going to make a popcorn wreath, here’s how to do it efficiently:
- Use a puffy styrofoam wreath base. The flat wooden base I used was too flat. If I had started with a foam base, my wreath would have looks fuller much more quickly, saving me hours and hours of time.
- Paint the wreath base white. Again, something else I wish I’d done.
- Attach wire or a hook to the back before you begin.
- Buy regular white popcorn. I used organic because that’s what I had in the house, but Jiffy Pop White Popcorn pops up much whiter. I would have preferred that, but I was too far in when I realized
- Air pop the popcorn. I made mine in a paper bag in the microwave.
- Put felt circles on the back of the wreath so it doesn’t rub against the door, knocking all the popcorn off the edges. I stacked three felt circles and applied three of these stacks
- Use Aleene’s clear gel glue.
- Layer newspaper on your table to catch the glue drips.
- Prop the wreath up on a couple of disposable plastic containers so you can access the sides and so it won’t stick to your paper.
- Pour the glue into a disposable container and dip one side of each piece of the popcorn in the glue, using as little as possible.
- Choose the big puffy pieces of popcorn as much as possible. Go around the wreath, gluing popcorn on then stop. If you try to add more popcorn on top of popcorn that is held by wet glue, it’s going to fall apart. Let the first layer dry before doing another. It needs several hours to dry.
- Every once in a while as you are working, go around the wreath and give the popcorn a squeeze with your whole hand, molding it to the wreath and ensuring it will really stick and hold together.
- Yes, the popcorn is going to break. Sometimes it breaks as you are dipping it in the glue. Other times it breaks when you attach it to the wreath. Sometimes it breaks later. It’s ok. You will have so much popcorn on this wreath no one will see.
- Try to layer the popcorn so that all glued sides are facing down and big puffy sides are facing up. The better you hide the glue, the whiter and fluffier the wreath will appear.
- Some of the popcorn is going to fall off. That’s why doing this in batches works. Let it dry, then hold it up and give it a little shake. If anything falls off, place a new piece of popcorn in its place.
- Tie some ribbon around it when it’s done to dress it up.
- Ta-dah! You’ve made a popcorn wreath.
You can follow any comment to this entry through the RSS 2.0 Both comments and pings are currently closed.


Amazing! I’ve never seen anything like this.
Just lovely, Brette. I’ve not seen this either but the homemade quality makes it so appealing and homey.
Lovely! I don’t think I’d have the patience to do this, but it does sound like you even got into some nice Zen moments during the making of it, which is a bonus!
These look amazingly beautiful.
Yes, I need to find more things to do with my hands like this. I was going to try embroidery or something like that, but I don’t know how to start and haven’t found any guides that actually tell me what to do with my always non-compliant hands. I remember one year I sewed a bunch of Barbie doll house stuff by hand for our daughter (curtains, blankets, tablecloths, etc) and it was so relaxing to just sit and do that.
Thank you!
I enjoyed reading about your adventures making this as much as I have looking at the result. Thanks, Brette!
I enjoyed reading about your adventures making this as much as I have looking at the result.
This is really neat, Brette. I know what you mean about the calming process of artistic and craft work. It’s been a while since I’ve painted anything – used to do oil painting all the time – but remember that feeling.
Of course, me being such a bird nut, I’m pondering whether this is something that my birds would like! I guess you’d have to use some sort of edible glue – maybe a sugary substance, or maybe peanut butter to hold everything together. Then by the time the holiday season is over, we’d get the benefit of seeing it outside and the birds could nibble on it until it’s gone. 🙂
Hmm yeah. Peanut butter doesn’t really get hard. Maybe a sugar gel – boiled down really far. You might be able to do something like this in a bundt pan. Look at a recipe for a birdseed wreath and substitute the popcorn then bake it so it hardens.
Thanks! It was definitely a challenge!
That’s a gorgeous wreath. And a lot of popcorn.