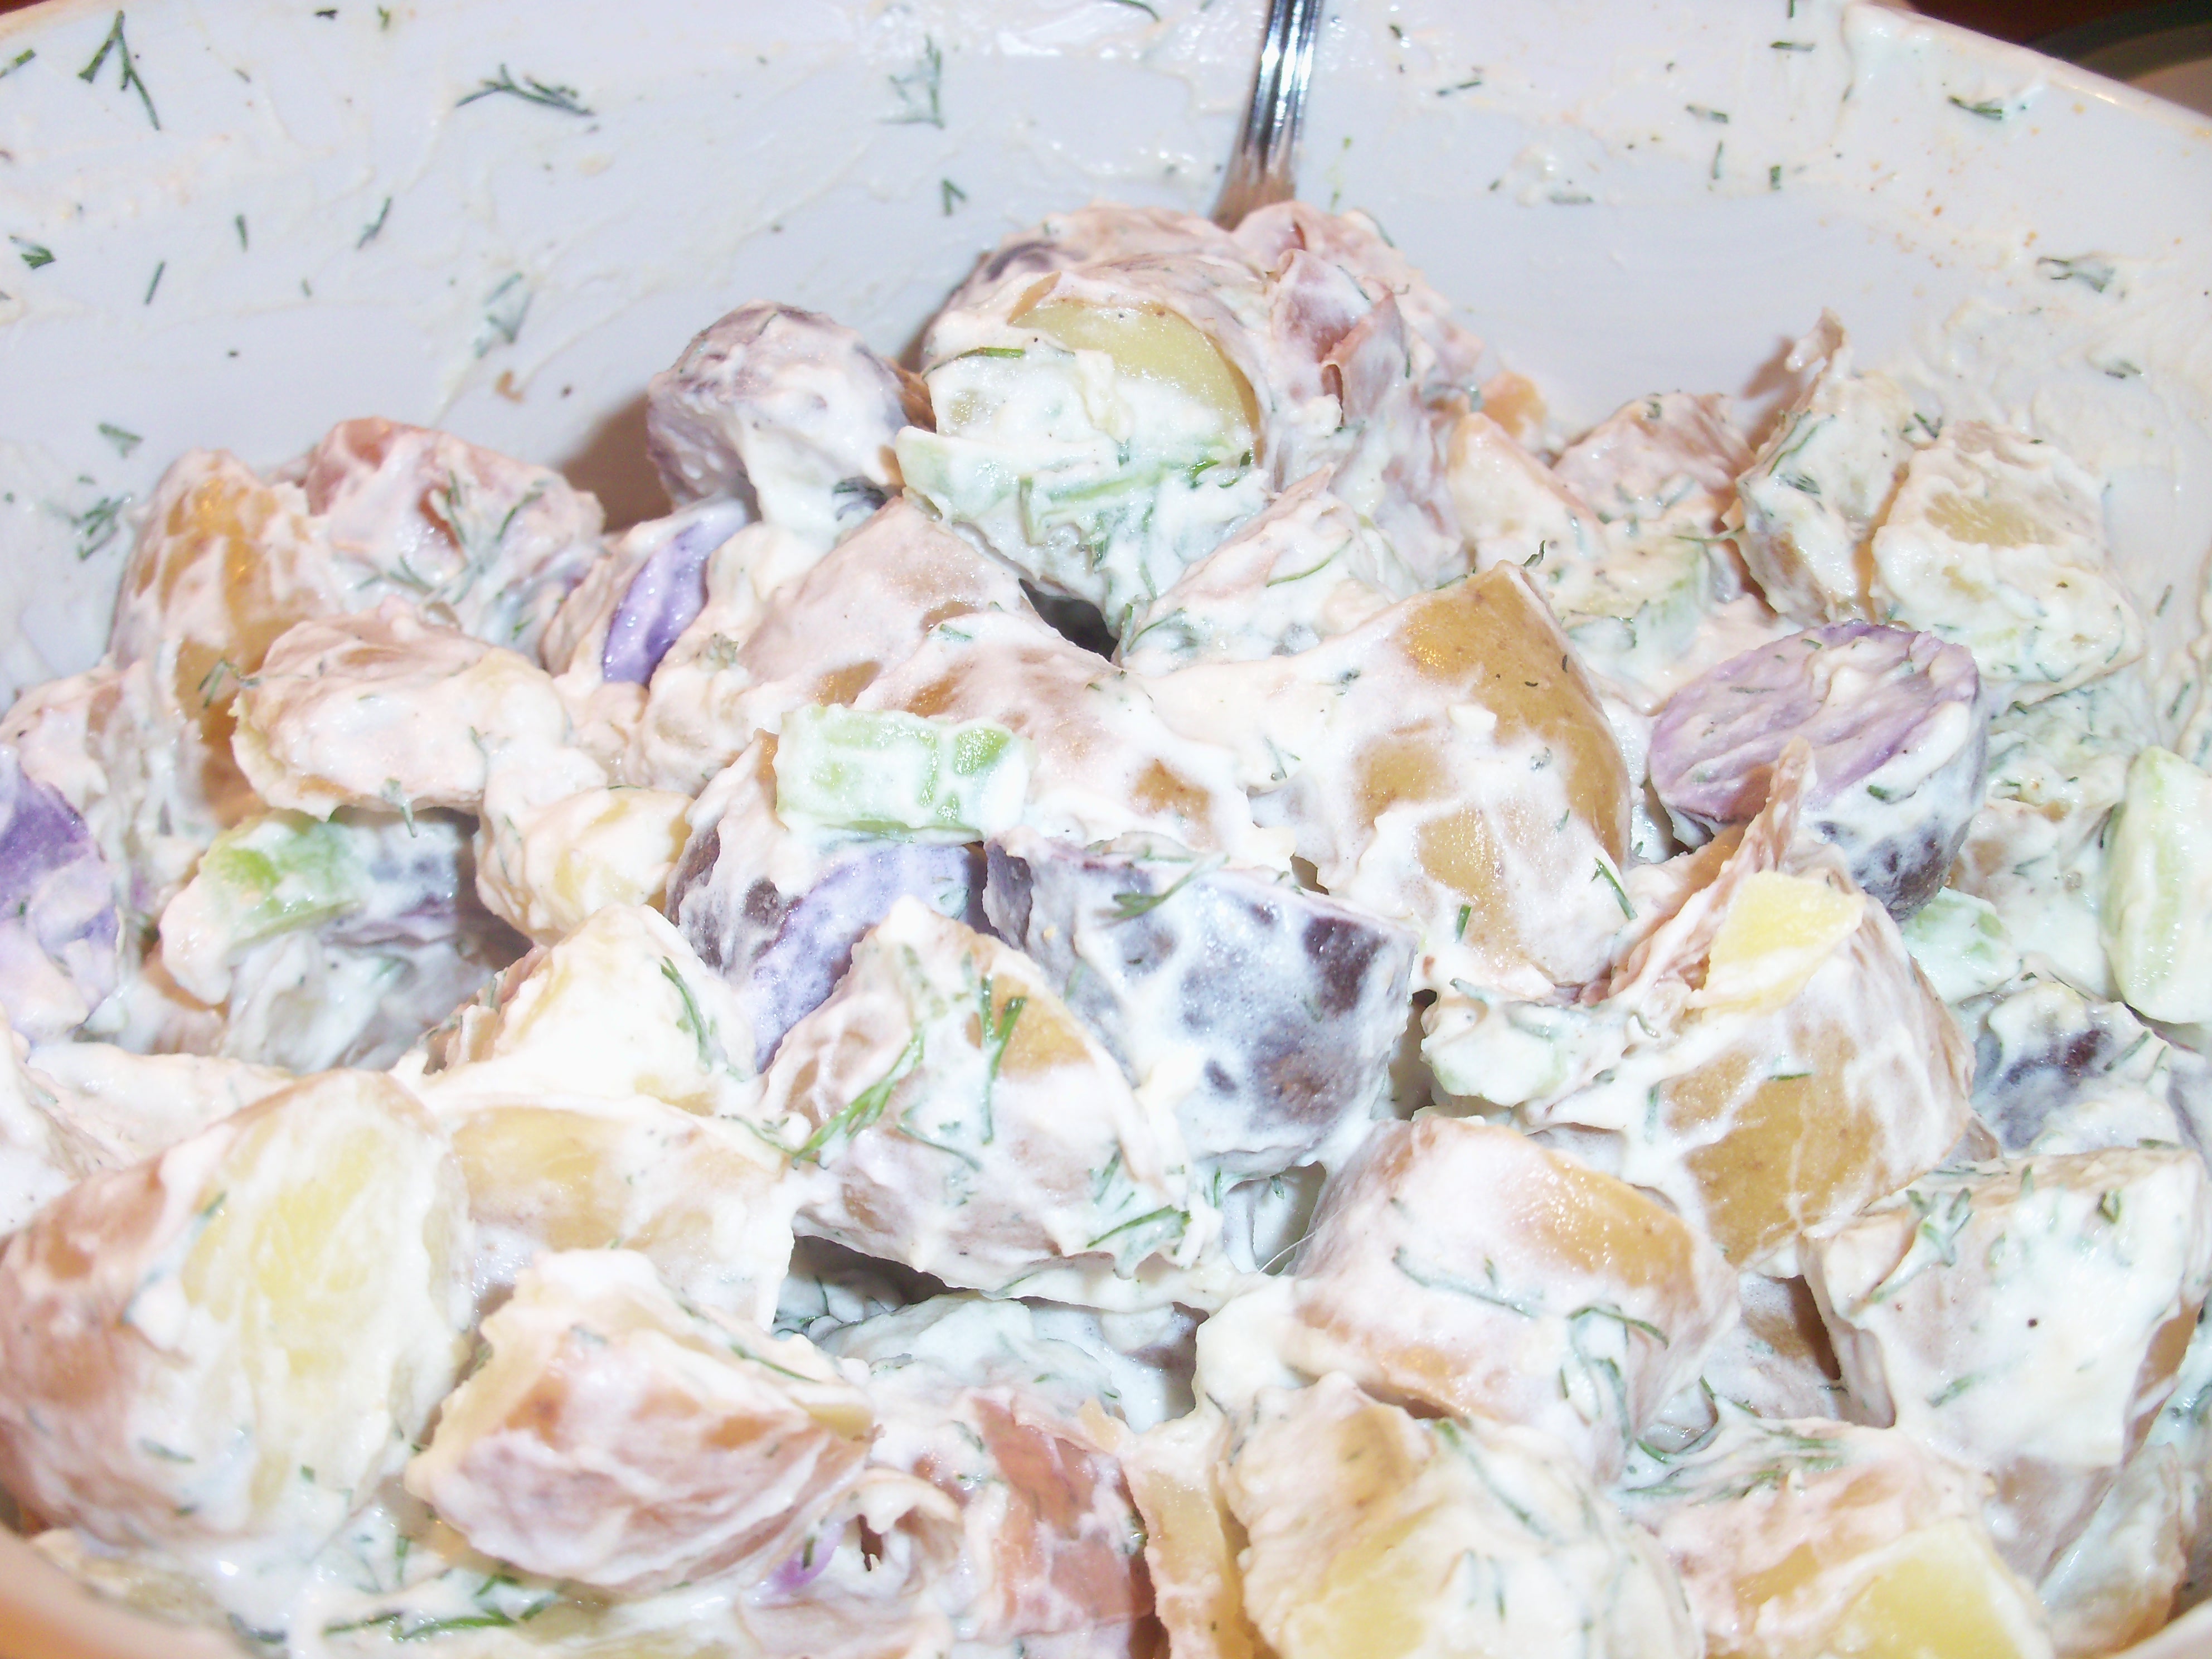
I grew up eating my grandmother’s potato salad, which contains potatoes, eggs, celery, onion, and Miracle Whip. It took me a while to get used to potato salad made with mayo, but I learned to like it. This summer when we were in Arizona, I had sour cream potato salad for the first time and enjoyed it. I’ve thought from time to time about replicating it, but never got around to it. The March issue of Cooking Light has a page with 4 potato salads, one of which is made with sour cream so I gave it a try.

Sour Cream Dill Potato Salad

Cut 3/4 lb fingerling potatoes into 1 inch pieces and boil until tender. Drain. Mix with 1/2 cup diced cucumber, 2 tbsp light sour cream, 1 1/2 tbsp Greek yogurt, 1 1/2 tsp chopped fresh dill, salt and 1/4 tsp pepper.

I enjoyed this as a change of pace. I liked the fact that yogurt was an ingredient and you really could not taste it. The dill added a nice fresh taste. I’m not sure about the cucumbers, but I didn’t mind them. I might try making it with eggs, celery and onion to see how that turns out. How do you like your potato salad?

I grew up eating my grandmother’s potato salad, which contains potatoes, eggs, celery, onion, and Miracle Whip. It took me a while to get used to potato salad made with mayo, but I learned to like it. This summer when we were in Arizona, I had sour cream potato salad for the first time and … Read more

Martha Mondays

Posted by Brette in Food

Megan at Megan’s Cookin has chosen Lime Bars for Monday’s recipe. Enjoy!

Megan at Megan’s Cookin has chosen Lime Bars for Monday’s recipe. Enjoy!

Sometimes I try to make Sunday dinner (roasts or pot pies, things that feel sort of homey), but who feels like spending tons of time doing dishes on a Sunday night? Not me. By Sunday night I’m trying to reserve my energy for the busy week ahead. This past weekend, I made a spinach stuffed pork roast, but I did it in parchment paper and it was fantastic! My mom always says that the pork you can buy today is nothing like it used to be. She always says it is too dry. Well, this recipe is not dry at all. The parchment seals all the moisture right in the roast, and the best part is there is no roasting pan to scrub!

Spinach-Stuffed Pork Roast in Parchment Paper

1 boneless pork roast (1.25-1.5 lbs)

Salt and pepper to taste

1/4 yellow onion, chopped

1 garlic clove, chopped

3 slices whole wheat sandwich bread, ripped into small pieces

1/4 teaspoon dried sage

8 ounces frozen chopped spinach, thawed and squeezed dry

1/8 teaspoon dry mustard

2 tablespoons beef broth

Butterfly the pork roast (cut through the center from one of the long edges, but stop before you get to the opposite side). Open it like a book. Season the pork roast with salt and pepper. Mix all other ingredients, with salt and pepper to taste, in a bowl and place 2/3 inside the roast. Close the “book” and place the roast on parchment paper (see Technique tab on this site for instructions about size and folding). Place the additional stuffing on top of the roast. Fold the parchment and bake at 375 for 45 minutes. Open the parchment packet (fold the edges down or cut them off) and return to the oven for about 10 minutes. Allow the roast to rest about 5 minutes before carving.

It came out delicious, moist and filled with flavor. I even ate some of the leftovers cold the next day for lunch and they were amazing!

Sometimes I try to make Sunday dinner (roasts or pot pies, things that feel sort of homey), but who feels like spending tons of time doing dishes on a Sunday night? Not me. By Sunday night I’m trying to reserve my energy for the busy week ahead. This past weekend, I made a spinach stuffed … Read more

The person scheduled for next week has dropped out, so I’m filling in and making a pick. I’m struggling with an awful cold that I am calling The Plague, so I apologize for not feeling very adventurous in my pick:

http://www.marthastewart.com/336507/brown-sugar-barbecue-chicken-drumettes?czone=food/dinner-tonight-center/dinner-tonight-main-courses&center=276948&gallery=275660&slide=284273

The person scheduled for next week has dropped out, so I’m filling in and making a pick. I’m struggling with an awful cold that I am calling The Plague, so I apologize for not feeling very adventurous in my pick: http://www.marthastewart.com/336507/brown-sugar-barbecue-chicken-drumettes?czone=food/dinner-tonight-center/dinner-tonight-main-courses&center=276948&gallery=275660&slide=284273

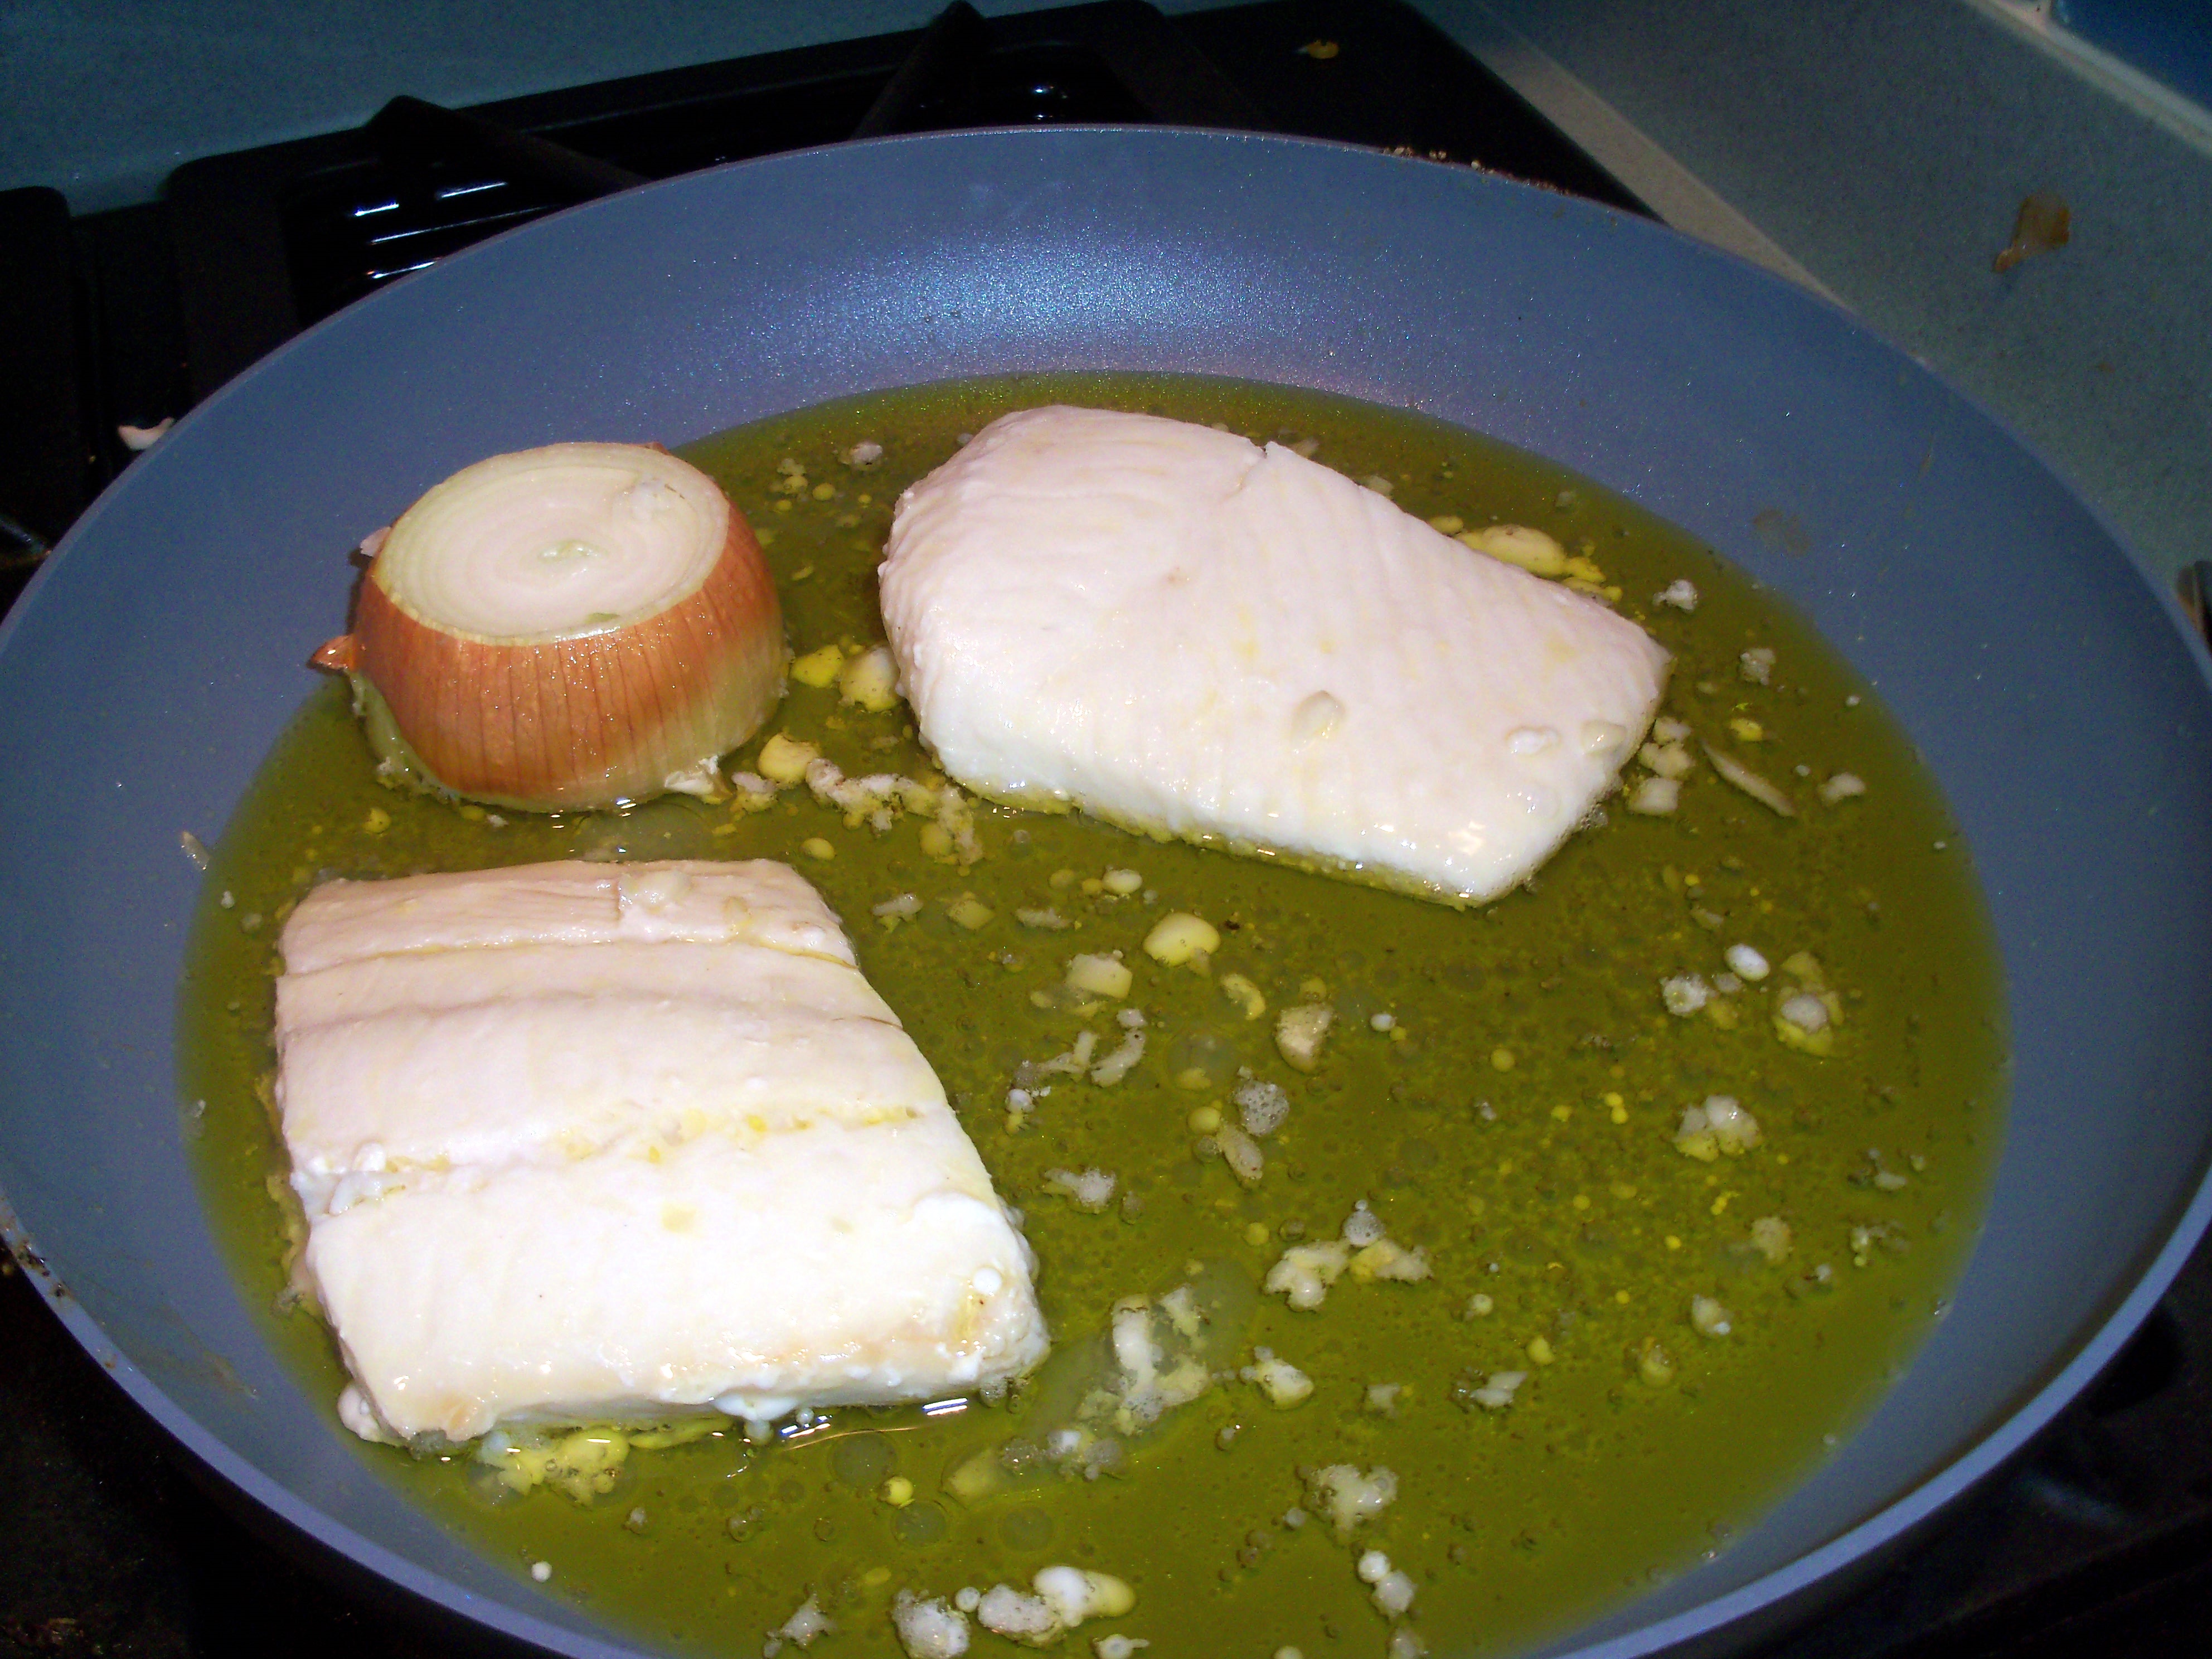
I’ve seen chefs use this technique on TV but never really understood it. It didn’t sound very healthy! There was an article about it in the recent issue of Cook’s Illustrated , so I decided to try it. The article says that this cooking method is not greasy and unhealthy like you might think. The high water content of the fish prevents the oil from absorbing into it. Cooking it at a low temp in the oil keeps it moist and keeps the oil out.

I placed 3/4 cup olive oil in an ovenproof skillet and placed half an onion in the center (the onion helps raise the level of the oil so you don’t need to use as much and also, I think, adds a little flavor). Heat the oil on the stove to 180 degrees (this happens quickly). Place 2 seasoned fillets of white fish (I used halibut, about 6 ounces each) in the pan and spoon oil over the top. Cover the pan and place in a 250 degree oven for 15 minutes. Remove from the oven and flip the fish. Cover and return to the oven for about 10-14 minutes, until it reaches 130 degrees. Mine was done in 10 minutes.

The recipe in the article involved frying some artichoke hearts and then using some of the oil from the fish to make a vinaigrette. I was out of artichoke hearts (thought I had some, but couldn’t find them- how often does this happen to you?), but I did use some of the oil with a handful of cherry tomatoes, blueberry vinegar, 2 garlic cloves, and a pinch of sugar and salt to make a quick sauce in the food processor.

I’m glad I tried this method, but don’t know if I would do it again. The fish was very moist and held together nicely, however, I missed the flavor you get when you grill, pan-fry, or bake fish in a sauce. It was really just like poaching the fish in water I think. Even with the sauce I made, it was just a bit bland. It was also a pain to be taking the fish in and out of oven.

I’ve seen chefs use this technique on TV but never really understood it. It didn’t sound very healthy! There was an article about it in the recent issue of Cook’s Illustrated , so I decided to try it. The article says that this cooking method is not greasy and unhealthy like you might think. The … Read more

I chose this week’s recipe from March Living (recipe posted in the comments here). And I ended up throwing the entire thing out. Sigh. It was a very simple recipe to make – toss the shrimp with the seasonings and roast, then serve with the sour cream sauce. I thought it was going to be fantastic. It was so hot not a single person at the table (include asbestos-mouthed Mr. MarthaAndMe and DudeMartha) could eat it. If it wasn’t so dang spicy, I think it would have been great. I would leave out the cayenne next time. And just for the record, this did not taste like Buffalo wings, which have a butter and hot sauce coating on them. Yes, these were spicy, but not with a Buffalo wing kind of flavor. Oh well.

Here’s the schedule for the coming weeks:

3/5 Elizabeth March Design

3/12 Megan’s Cookin’

3/19 I need to skip this week

3/26 Sassy Suppers

4/2 Perfecting Pru

4/9 and 4/16 I need to skip these dates

4/23 Tiny Skillet

4/30 Sweet Almond Tree

5/7 MarthaAndMe

I chose this week’s recipe from March Living (recipe posted in the comments here). And I ended up throwing the entire thing out. Sigh. It was a very simple recipe to make – toss the shrimp with the seasonings and roast, then serve with the sour cream sauce. I thought it was going to be … Read more

CSA

Posted by Brette in Food | Gardening

Photo credit: Simon Howden

We have just signed up for a share in a CSA. For those of you who haven’t heard of this, a CSA is community supported agriculture. You pay a fee up front for a “share” which entitles you to pick up your portion of the farm’s output each week during growing season. I’ve been wanting to do this for years, but had some requirements I was having trouble with:

–  I needed a farm that was reasonably close by. I did not want to drive 45 minutes each way. I found one that is literally 10 minutes away.

– I wanted weekday pick up times. Many farms schedule pick ups on weekends and we spend many weekends at my parents’ lake house.

– The farm had to be organic (not necessarily certified, but meeting standards at least).

I finally found all of this in The Root Down Farm. We’ll be getting a share every week for 22 weeks, from June to November. The farm also has a u-pick section which includes cutting flowers and some veggies you can just help yourself to. I wish they also had fruit, but that’s asking a lot! The cost is $540 for the season (which works out to about $24 a week) for a share that feeds 4 people. That is probably a bit more than I spend each week on produce, but it feels like an investment that will be worthwhile. I think it will force me to use more veggies, and to try veggies I might not be using at this point.

My dad used to have tons and tons of veggies he shared with me, but in recent years, he hasn’t grown as much at all, so I’ve been buying more at the store. I’m also excited to be supporting a local farmer. My grandfather’s family was one of the original farming families in our town, so this feels like going back to my roots.

A local store called Farmers and Artisans sells locally grown produce, dairy and meats, and also has a bakery. They are selling organic milk shares. I toyed with doing this, but ultimately it didn’t make sense. The cost per gallon was at least $1 more than I pay at the grocery store, I would have to drive farther to get it, and the milk does not come in glass bottles. As far as I’m concerned, that is the holy grail I am searching for – milk that is organic and in glass. I can get organic milk in plastic or I can get regular milk in glass.

What has your experience with CSAs been like?

We have just signed up for a share in a CSA. For those of you who haven’t heard of this, a CSA is community supported agriculture. You pay a fee up front for a “share” which entitles you to pick up your portion of the farm’s output each week during growing season. I’ve been wanting … Read more

It’s my pick for next week and I’d like to do the Roasted Buffalo Shrimp from March Living, p. 68 insert. Let me know if you need the recipe.

It’s my pick for next week and I’d like to do the Roasted Buffalo Shrimp from March Living, p. 68 insert. Let me know if you need the recipe.

Are you sensitive to onions cooking? It doesn’t bother me at all. I can slice and cook onions all day without shedding a tear. I must be a weird genetic mutant, but any time I cook any amount of onion, my kids stagger into the kitchen with tears running down their faces, practically sobbing “Are you cooking onions?!” I turn on the exhaust fan and open the window (yes, even in February) but nothing much seems to help. I tortured them yet again to make this recipe. They will tell their therapist about this when they are older.

There’s a recipe for Onion Bisque in the March issue of Bon Appetit from Le Petite Grocery in New Orleans that I just had to try (even if it made my kids cry). I am a big, huge, giant fan of French onion soup, but I find it hard to eat with the bread and cheese – too complicated. This recipe purees the soup which solves that problem. I’ve adapted it, so here’s my version:

2 tbsp olive oil

3 large sweet onions, peeled and sliced thinly

4 garlic cloves, peeled and smashed

1 teaspoon dried thyme

3 cups chicken broth

3 cups beef broth

3 slices day old whole wheat bread

3 slices Swiss cheese

Heat the oil in a large wide pot over medium low and add the onions. Cook for about 20 minutes, stirring often. Add the garlic and cook another 20 minutes, stirring until onions are a deep golden color. Add the thyme and broths and bring to boil. Reduce the heat and simmer for 20 minutes. Turn off heat. Add the bread and cheese to the pot and let it sit for about 10 minutes until the bread is mushy and the cheese is softened. Use a hand blender and puree the soup. Reheat to just barely boiling and serve. Serves 4-6.

It was fan-friggin-tastic. Creamy and smooth and so deeply flavorful it made me moan. The bread thickens it nicely and you get all the flavor of traditional French onion soup without the stringy cheese mess or trying to hack up the bread with your spoon. I’ll be making it this way from now on (tears be damned).

Are you sensitive to onions cooking? It doesn’t bother me at all. I can slice and cook onions all day without shedding a tear. I must be a weird genetic mutant, but any time I cook any amount of onion, my kids stagger into the kitchen with tears running down their faces, practically sobbing “Are … Read more

Winner!

Posted by Brette in Food

Congrats to Alexandra Grabbe who was selected by a random number generator as the winner of Parents Need to Eat Too. Thanks to all who entered!

Congrats to Alexandra Grabbe who was selected by a random number generator as the winner of Parents Need to Eat Too. Thanks to all who entered!

no