It was time to buckle down and do some crafting with Martha. I decided to make the oak-leaf bowl from p. 95-96 of Nov. Living, which Martha also made on the show. It looked not too complicated.
First off, I hit the craft store. This was actually a cheap project for me. I bought a piece of felt for 79 cents and got a remnant of some tweed for $2.17. The fusing material was $3.99 (I think there are 3 or 5 in the bag and I used only one).

Come fuse with me
Ok, so I started off

Totally fusionary
fusing the two fabrics together. This was easy. The hardest part was finding the iron! We never use it and it was stuffed away somewhere.
Next I cut out the leaf template that Mr. MarthaAndMe brilliantly enlarged for me on the computer. I’m not sure who has a copier at home that will enlarge things, but I sure don’t have one. Martha was pretty casual about this – “Now just blow it up on your printer or copier”. Umm, ok.
Martha says to trace the template on the material using a disappearing ink pen. I don’t have one of those (or if I did, it must have disappeared). Mr. MarthaAndMe suggested I trace it with chalk. He’s just as cute

Template time
as he is smart, folks! This worked well. Next, I cut out the material. This was hard on the hands, but doable.
Martha then wanted me to “create darts” by sewing closed the V-shaped notches on the fabric with a “zigzag stitch”. First problem, I don’t have a sewing machine. Second problem, I really am not sure what a dart is. Third problem – no clue what a zigzag stitch is. Those are some big problems, gang.

Chalk it up

The cut out
I hand sewed this and did it so that I stuck the needle in one side and pulled it out the other. Instead of making it go back in the side it just came out of, I looped it over the top of the seam so it went back in the first side (I’m you sewing geniuses know what this is called, but I don’t). This kind of covered up the bare edges of the fabric. It took a while and my fingers are pretty mangled.
Once it was done, I was pretty impressed by it. It really looks like a leaf. Not sure what I would put in it though. And I’m not really a big lover of fall type colors. Mr. MarthaAndMe suggested I give it as a gift and maybe I’ll end up doing that. I’m not sure it’s exactly perfect enough to do that with though (some of the edges are a tiny bit frayed).

Ta-dah!
So now for the deeper questions. How did this project make me feel? I have to say that I have always somewhat enjoyed hand sewing. I once hand sewed a cushioned seat and back for a child’s rocking chair and I also hand sewed some doll house things – curtains, tablecloths, sheets, blankets, and pillows. I’m not too bad at mending holes and I can sew a button on, so I’m not a total loser. There is something very relaxing about sitting still and doing something like this with your hands. It’s a nice brain-free activity – something that does not require higher thought. I don’t like messing things up though and get frustrated when the needle goes the wrong way, the thread gets knotted or I sew it crooked. This one was pretty idiot proof though I have to say, if I was able to make it turn out looking this good.
This project took me a couple of hours. I don’t know if the time put into it equals the result. I know it is supposed to be about the process and the joy of creating something with your own hands. I get that, but I think I might rather go shopping and buy something I like that is really well-made.
It was time to buckle down and do some crafting with Martha. I decided to make the oak-leaf bowl from p. 95-96 of Nov. Living, which Martha also made on the show. It looked not too complicated. First off, I hit the craft store. This was actually a cheap project for me. I bought a … Read more →

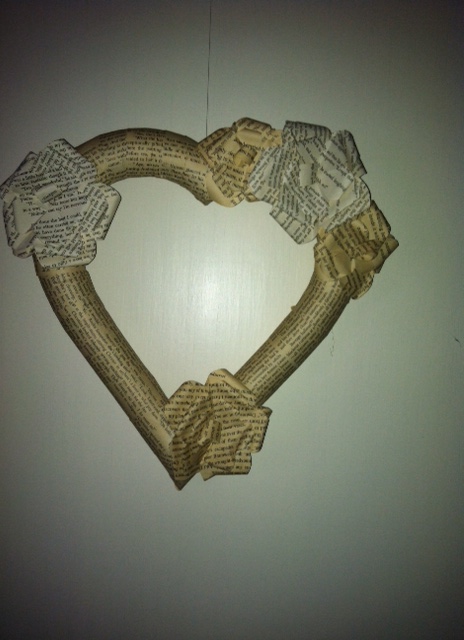 I picked up this cute wreath at a local shop. It’s made by a local senior. He also had pumpkins, trees that similar, and some flowers made out of rolled paper. Some of his items are made with music scores as well. This is hanging on my office door for Valentine’s Day. I think it would be easy to make. Buy a heart wreath form, pick up a vintage book and a used newish book (to get the contrast in paper colors) and decoupage it on. Cut the paper in flower shapes and gently roll the edges, layering the shapes on top of each other. I paid $21 for this.


 Martha Mondays is here again. This time, the scheduled Martha project was map coasters. If you made this project (or if you haven’t yet, post when you do), post a link to your blog or just leave a comment saying how it went for you.
 some trouble cutting the maps out. Martha says to use the knife to trace around the edge of the coaster. Mine didn’t come out perfectly even and in some places it was still attached to the paper, so I used scissors to cut it and trim it. They weren’t perfectly round. And once I even sliced away some of the cork! I am a menace with craft knife in hand.
 Dude Martha assisted on this project. We painted ModPodge on the coaster, placed the map on top and smoothed it out. Then we applied more ModPodge and also did the edges. We left them to dry.
 to the family lake house (since I used a map of the lake) and I think they will be a fun thing to have there. This project was easy (if *I* can get good results, it must be easy) and fun. You could do lots of other things other than maps with this. Photos, patterned paper, print outs of famous paintings, all sorts of neat things.
 wait to see your results!!


